Expose k8s services via Cloudflare Tunnels
So, you finally got a homelab but could not access it from outside your network because of CGNAT.
CGNAT is basically your ISP saying: No public IP for you, share it with 500 strangers instead.
And then you cry while trying to reach your cluster from the outside.
I faced this too. The initial plan was to use a Cloud VPS and build a WireGuard tunnel, but then I stumbled across Cloudflare Tunnels and instantly liked the simplicity. If I ever face latency issues (as people on Reddit say sometimes happens), I am also considering Pangolin on an Oracle free instance.
Here, I will walk through how I exposed my Kubernetes services through Cloudflare Tunnels. Cloudflare Tunnels uses a lightweight daemon called cloudflared, which we run as a DaemonSet for high availability.
Cloudflare Domain Setup#
Cloudflare Tunnels require a domain. I got a free one from Digiplat:
https://github.com/DigitalPlatDev/FreeDomain
Shoutout to them for offering free TLDs like:
- .DPDNS.ORG
- .US.KG
- .QZZ.IO
- .XX.KG
After getting your free domain, you need to configure Cloudflare nameservers.
Steps on the Cloudflare dashboard#
- Create or log in to a Cloudflare account
- Go to Websites and click Add a site
- Enter your Digiplat domain and click Continue
- Choose the Free plan and Continue
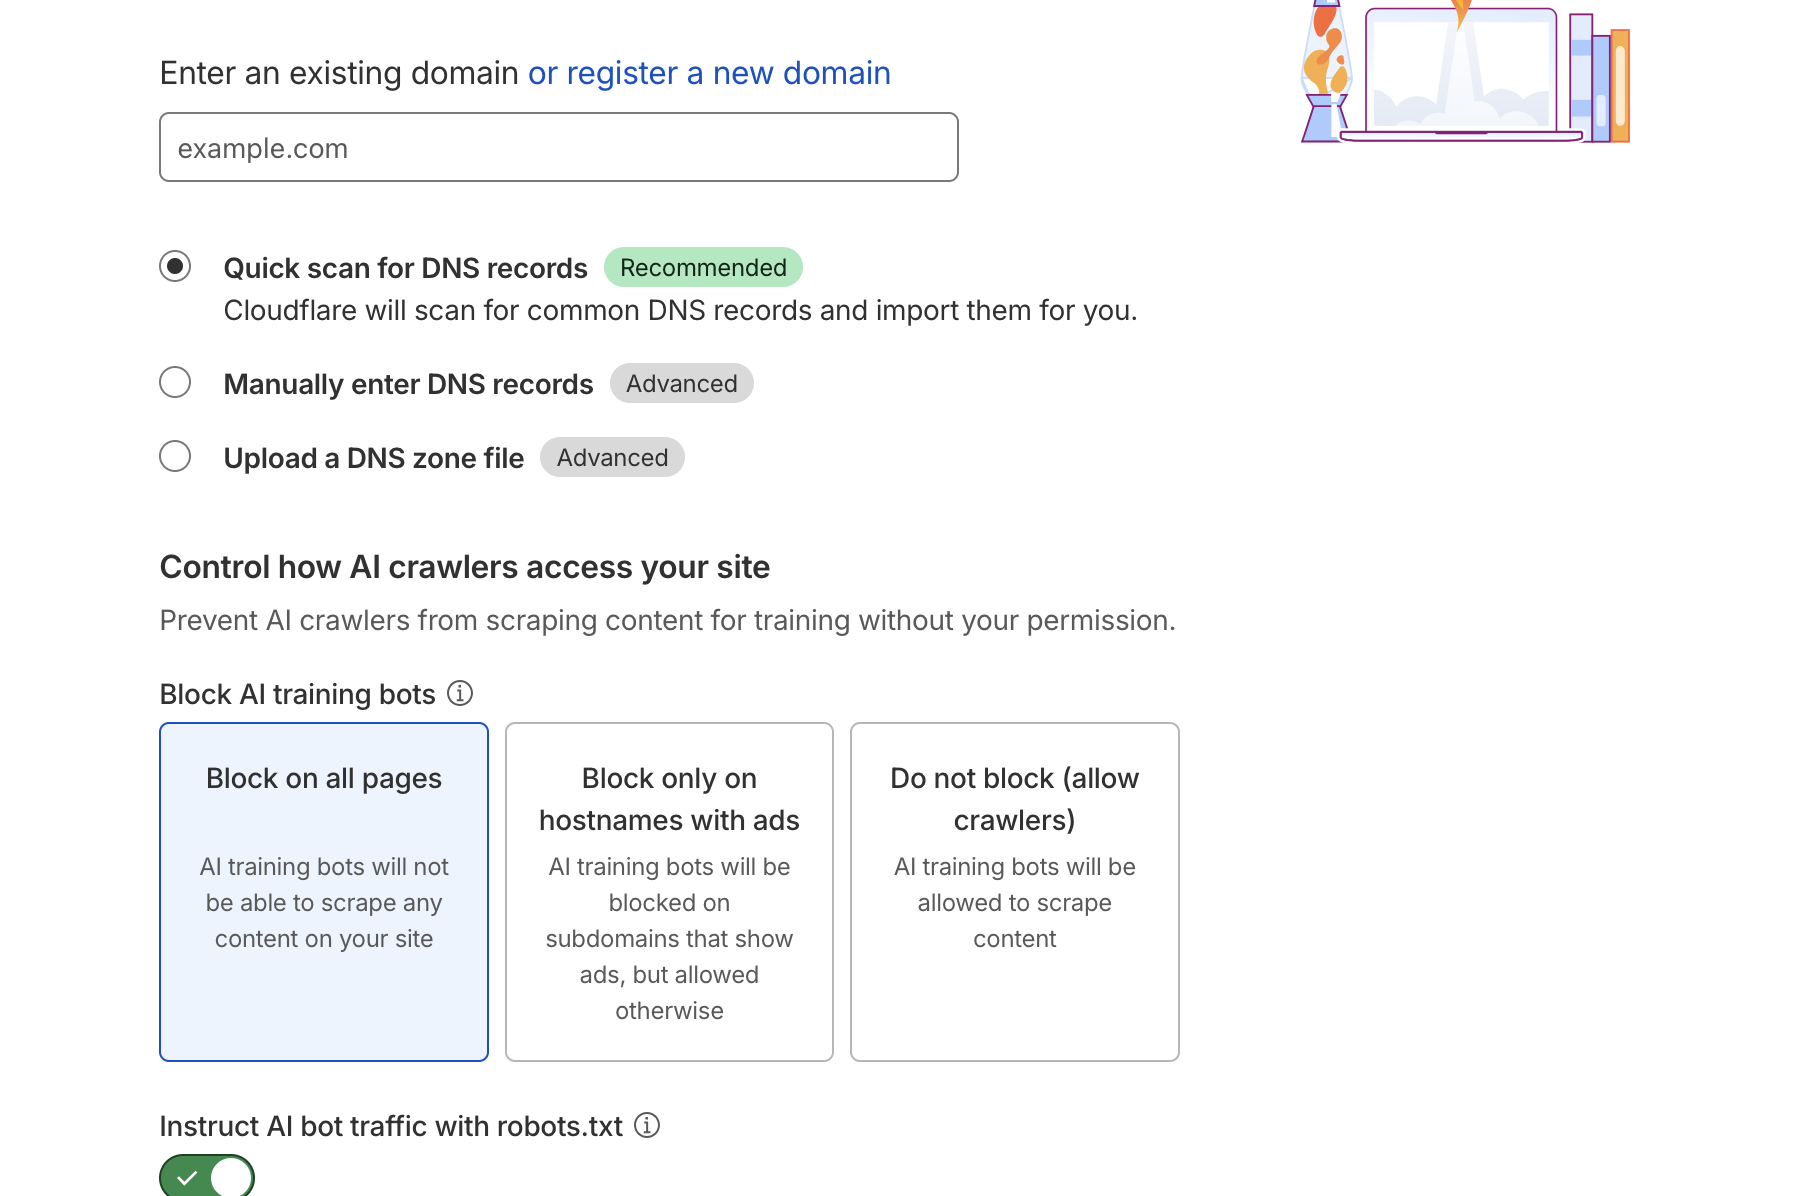
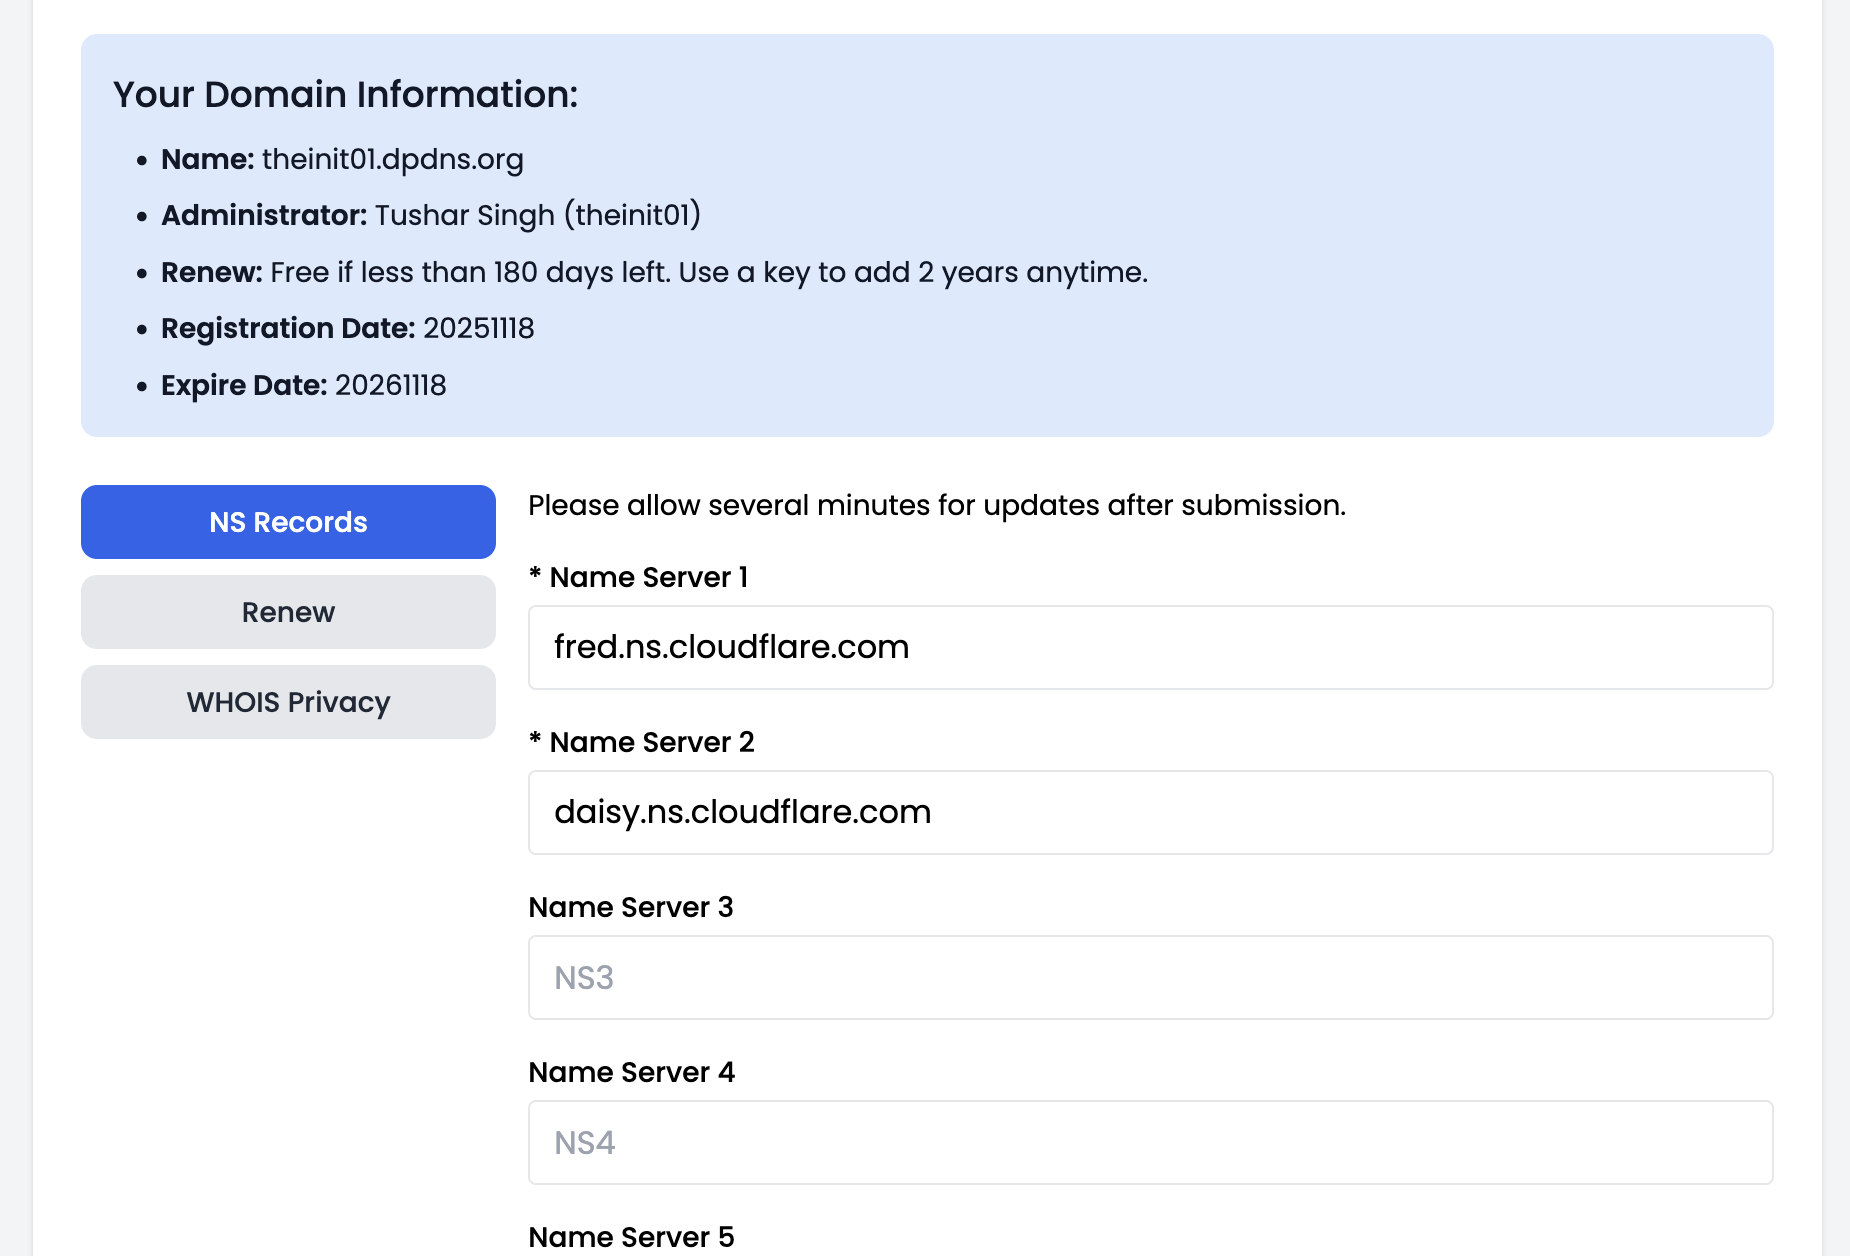
- Cloudflare will show you two nameservers
- Go to your Digiplat account domain settings and replace the existing nameservers with the Cloudflare ones
- Wait for DNS propagation
Once completed, the Cloudflare dashboard will show Active next to your domain.
Create a Cloudflare Tunnel#
- On Cloudflare dashboard, go to Zero Trust
- Open Networks
- Click Tunnels
- Click Create a tunnel
- Select Cloudflared
- Name your tunnel
- Choose Docker as the deployment method
- Copy the Token shown
Deploy cloudflared on Kubernetes#
Create the namespace:
kubectl create ns cloudflared
Create the secret:
kubectl create secret generic cloudflared-token -n cloudflared --from-literal=TUNNEL_TOKEN='<YOUR_TOKEN>'
Apply the DaemonSet manifest:
apiVersion: apps/v1
kind: DaemonSet
metadata:
  name: cloudflared
  namespace: cloudflared
  labels:
    app: cloudflared
spec:
  selector:
    matchLabels:
      app: cloudflared
  template:
    metadata:
      labels:
        app: cloudflared
    spec:
      serviceAccountName: cloudflared
      containers:
        - name: cloudflared
          image: cloudflare/cloudflared:latest
          imagePullPolicy: IfNotPresent
          args:
            - tunnel
            - --no-autoupdate
            - run
            - --token
            - $(TUNNEL_TOKEN)
          env:
            - name: TUNNEL_TOKEN
              valueFrom:
                secretKeyRef:
                  name: cloudflared-token
                  key: TUNNEL_TOKEN
          resources:
            requests:
              cpu: 20m
              memory: 64Mi
            limits:
              cpu: 200m
              memory: 256Mi
      restartPolicy: Always
---
apiVersion: v1
kind: ServiceAccount
metadata:
  name: cloudflared
  namespace: cloudflared
This will deploy a cloudflared instance on all your Kubernetes nodes. In your Cloudflare dashboard, under the tunnel page, you should now see the number of connectors equal to the number of nodes.
Publish services via Cloudflare#
- In the tunnel page, click Configure
- Go to Public Hostnames
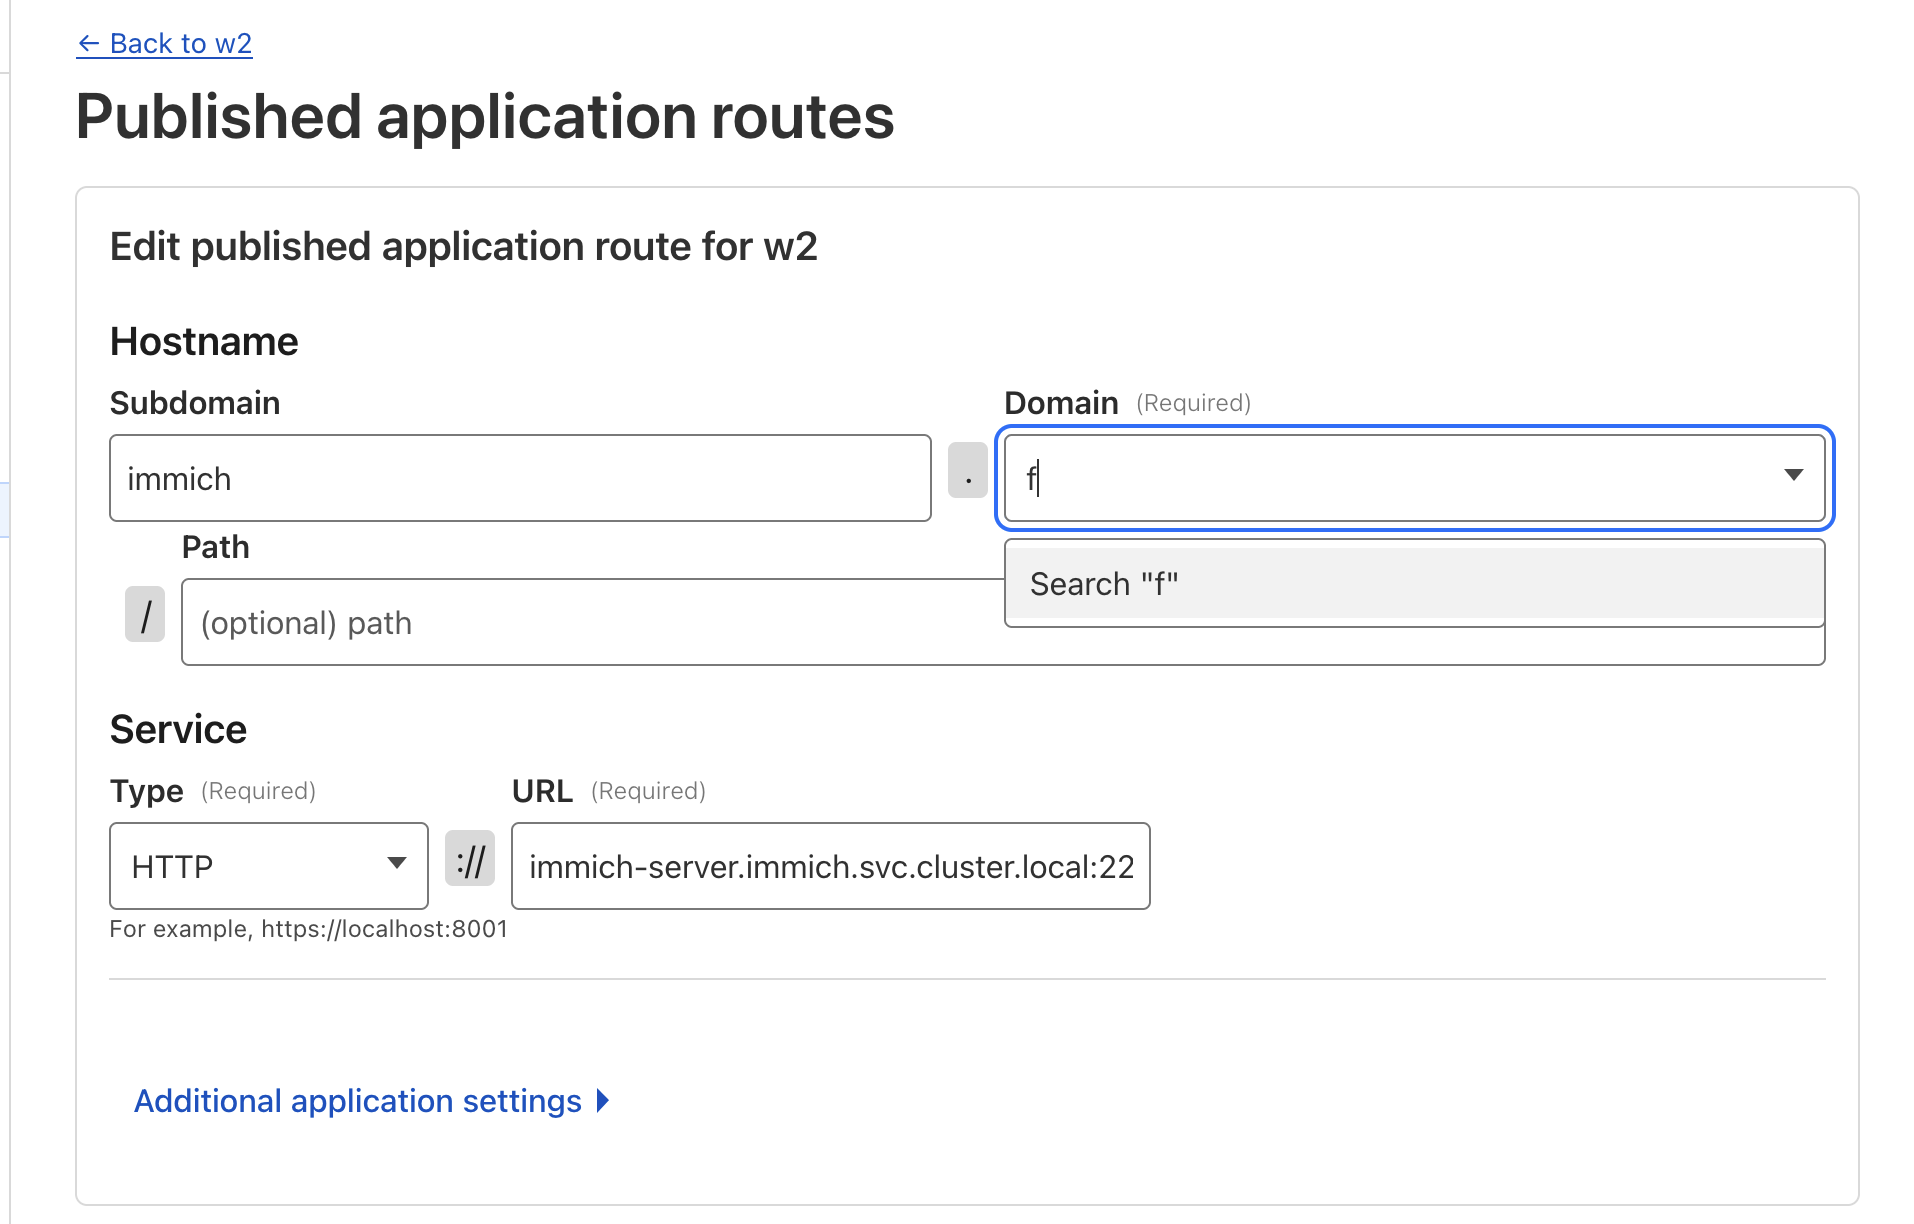
- Click Add a public hostname
- Choose a subdomain like argocd
- Select your domain
- Service type: HTTP
- URL: service DNS name inside the cluster
argocd-server.argocd.svc.cluster.local:80
Now your app is available at:
https://argocd.<yourdomain>
Secure access to your cluster without exposing any real ports, without static IPs, and without crying over CGNAT.
Closing Thoughts#
Cloudflare Tunnels are a ridiculously easy way to expose Kubernetes apps securely over the internet. Zero reverse proxy config, no messing with port forwarding, and no public IP needed. If it causes trouble later, I might try Pangolin too.